Hi everyone ![]()
I’m working on a project where I need to generate a flat image from a button photo — basically an image with the same color and pattern as the button, but without any holes, lighting, or shadows.
Take a photo of a button (which has holes and curved reflections), and create a flat version of it where the area inside the holes is intelligently filled with matching pattern and color.
![]() Goal
Goal
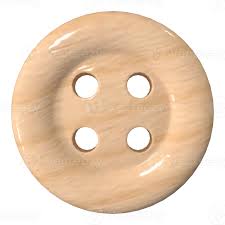
Take an image like this ![]()

Basically — remove the lighting, fill holes intelligently, and produce a seamless, flat surface with the same color/pattern as the original button.
![]() What I’ve tried so far
What I’ve tried so far
-
OpenCV Inpainting:
Works for simple fills but gives blurry results and wrong color tones. -
Hugging Face Stable Diffusion Inpainting:
Tried therunwayml/stable-diffusion-inpaintingpipeline with mask, but it generated random textures or background instead of the real pattern. -
Cropping + Tiling:
Works only if the button color is solid, but fails when there’s a gradient or marble-like pattern.
 What I’m looking for
-
Is there any AI model or method that can intelligently generate a flat texture from a photo (preserving the same color/pattern)?
-
Should I use Diffusers, ControlNet, or Texture Synthesis models for this?
-
Any tips, examples, or notebooks that can help me achieve better results?
 My Setup
-
Language: Python
-
Libraries: OpenCV, Diffusers
-
System: macOS M1
-
Torch Backend: MPS (Metal)
Example Code
Here’s a simplified version of my inpainting attempt:
from diffusers import StableDiffusionInpaintPipeline
from PIL import Image
import torch

pipe = StableDiffusionInpaintPipeline.from_pretrained(
    "runwayml/stable-diffusion-inpainting",
    torch_dtype=torch.float16
).to("mps")

result = pipe(
    prompt="fill the button hole with same color and make it flat texture, realistic fabric color, consistent pattern",
    image=Image.open("button.png"),
    mask_image=Image.open("mask.png")
).images[0]

result.save("flat_button.png")
 Images
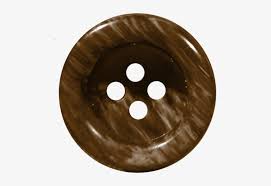
I’ve attached a couple of real button photos for reference.
They have small holes and lighting variations, which is making it tricky to create a clean flat texture.
![]() Any guidance appreciated
Any guidance appreciated
If there’s a specific model, prompt strategy, or approach I should test, I’d love to hear your thoughts.
This is part of a real-world project where consistent textures are crucial for product visualization.
Thanks in advance for your time and help! ![]()
